Getting Started
Basics
In order to use owo-config, you need to have the relevant annotation processor active in your build environment. To do this, edit the dependency (from setup):
dependencies {
    annotationProcessor modImplementation("io.wispforest:owo-lib:${project.owo_version}")
}
The first step to creating your config is making a config model class. This class describes the structure of your config, but is never interacted with directly. Instead, you simply apply the @Config annotation and the annotation processor takes care of the rest.
As you can see, this annotation accepts two attributes - both of which are equally important.
-
nameis the filename under which your config is saved, as well the identifier that's used when your config is sent over the network -
wrapperNameis the name of the actual config class which will get generated. This is the class which you interact with to load your config and pass it around, so choose something sensible
You can now add options to your config. To do that, simply add fields to your class.
@Config(name = "my-config", wrapperName = "MyConfig")
public class MyConfigModel {
public int anIntOption = 16;
public boolean aBooleanToggle = false;
public Choices anEnumOption = Choices.ANOTHER_CHOICE;
public enum Choices {
A_CHOICE, ANOTHER_CHOICE;
}
}
After you're done adding your first options, it's time to build your project once. This runs the annotation processor and will generate the wrapper class, ready to use. Once this has completed, load the config in your mod initializer:
public class MyModInitializer implements ModInitializer {
...
public static final MyConfig CONFIG = MyConfig.createAndLoad();
...
}
Note for Eclipse IDE users
If you are using Eclipse IDE, you will need to do some additional configuration to get the generated class to register. In your build.gradle, add the following:
sourceSets.main.java.srcDirs += [ 'src/main/generatedJava' ]
compileJava.options.generatedSourceOutputDirectory = file("${projectDir}/src/main/generatedJava/<your config class package>")
This will ensure that the generated class ends up the correct directory, and that it gets picked up by Eclipse. Just make sure to replace <your config class package> with the path of your ConfigModel's package. For example if your ConfigModel class is at: com.example.config.MyConfigModel, you would use com/example/config.
And that's it! You can now use your config values everywhere.
Additional options
The @Config annotation provides two additional parameters - defaultHook as well as saveOnModification.
-
defaultHookdefaults tofalseand declares whether all of your config options should be treated like they were annotated with@Hook- that is, have a method to register callbacks -
saveOnModificationdefaults totrueand tells the config whether it should automatically save itself whenever any of the options are changed
Translations
Each option's translation key is generated based on its key as well as the config it resides in. The generated keys take the form text.config.<config name>.option.<option key>. To add a tooltip to an option, simply add a translation for the text.config.<config name>.option.<option key>.tooltip key, it will automatically show up. This translation supports \n line breaks for formatting the tooltip.
Translation keys for enums are generated based on the name of the option, like this: text.config.<config name>.option.<option key>.value.<name of enum value>. The name of the enum value is always fully lowercase.
Registering with ModMenu
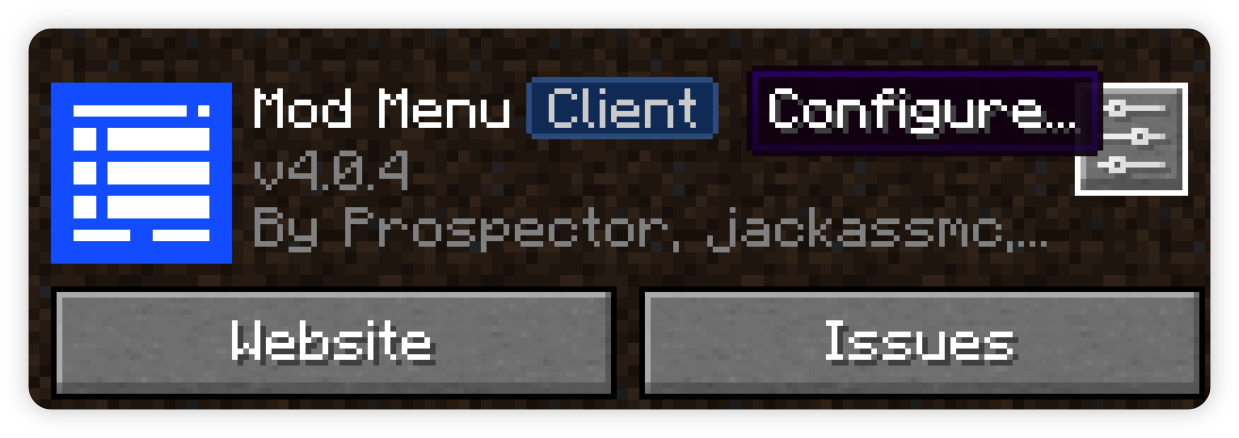 In order to make your config screen available from ModMenu, you only need to apply the
 @Modmenu annotation to your config model class.
@Modmenu(modId = "mymodid")
@Config(name = "my-config", wrapperName = "MyConfig")
public class MyConfigModel {
    ...
}
The annotation requires that you pass in your mod's id, and optionally a custom UI model. This UI model is the XML file that's used for generating the config screen - customizing this file is the easiest way to customize your config screen.
Organizing the config screen
When your config has more than just a few options, it is often beneficial to organize it in a sensible manner. owo-config provides two tools for this purpose - sections and nested objects
Sections
 A section gets a header as shown above and can also be quickly navigated to using the sidebar. To begin a new section in your config, simply apply the
 @SectionHeader annotation to the field with which you want the section to begin.
Example:
@Config(name = "my-config", wrapperName = "MyConfig")
public class MyConfigModel {
    public String firstOption = "1";
    ... // many more options

    @SectionHeader("someSection")
    public String someLaterOption = "42";
}
Nested Objects
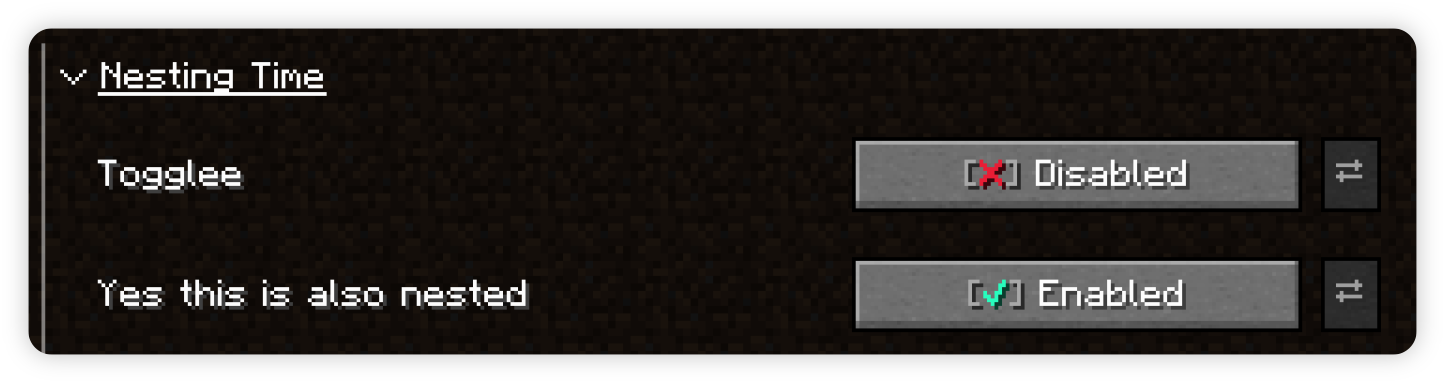 A nested object adds a level of indentation to all the options inside it. It can also be collapsed to be out of the way if the options it contains are rarely needed. To define a nested object, declare an inner class in your config model, add a field of its type and apply the
 @Nest annotation to said field.
Example:
@Config(name = "my-config", wrapperName = "MyConfig")
public class MyConfigModel {
    ...

    @Nest
    public ThisIsNested nestedObject = new ThisIsNested();

    public static class ThisIsNested {
        public boolean aNestedValue = false;
        public int anotherNestedValue = 42;
    }
}